Advertisement
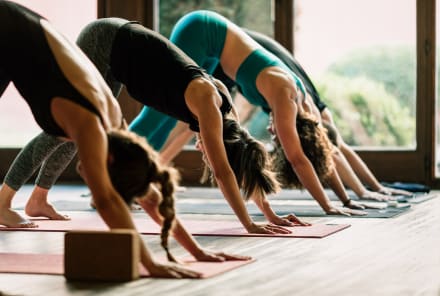
When you think of your core, you probably zero in on your abs. But if you're not also thinking about your back, you're missing an important part of the equation. Strengthening all 360 degrees of your middle is imperative for a healthy spine and body—and that's why I've developed a sequence of yoga poses meant to help you strengthen your back, specifically. I give a few basic options and then one that is a bit more challenging, so you can pace yourself according to where you are. (No need to push yourself too much!)
Back strengtheners tend to be challenging in general, because it seems we are working against gravity. This requires strength. But the most important muscle you need developed is your mind muscle. Stick with it and repeat these daily in order to help yourself be healthier and happier.
A limber spine is a young one! I recently taught a workshop in Pennsylvania, and there was a 79-year-old woman in class. She could do all the poses, and was so flexible. After class, she and I took a walk up hill and I didn’t have to slow myself down for her. Our pace was the same, and she is 43 years older than I am. I was humbled. Let’s all be like Jackie, the 79-year old super hero!
Cobra Pose
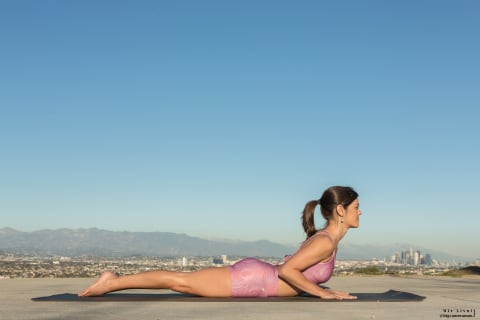
Start lying on your belly. Place your hands by your ribs palms pressing down firmly. Activate your legs and press the tops of your toes into the mat. As you inhale lift up your chest and pull the sternum forward. Roll your shoulders back and down. Make the back of your neck (cervical spine) long by tucking the chin in slightly and extending the crown of your head forward. Spiral your thighs inwards and tuck your tailbone under. Take 5 deep breaths. Lower down and rest. Then do two more rounds of 5 breaths each.
Salabasana (Locust Pose) Variation
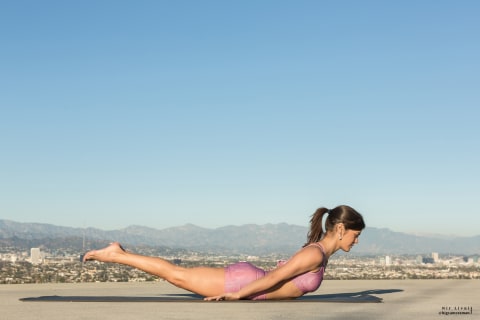
Start lying on your belly. Extend your arms by your sides and place the tops of your hands onto the floor, palms face up. Bring your legs together and, on an inhale, lift your legs, chest, and head up. Keep your hands firmly pressing down. Spiral your thighs inward and make sure you aren’t clenching your glutes. Tuck your tailbone under and extend the back of your neck again. Squeeze the shoulderblades together and open the chest. Take 5 deep breaths. Lower down and rest. Then do 2 more rounds of 5 breaths.
The next four poses are in sequence. Try one at a time to see where you need to pause and practice more of.
Full Locust Prep 1
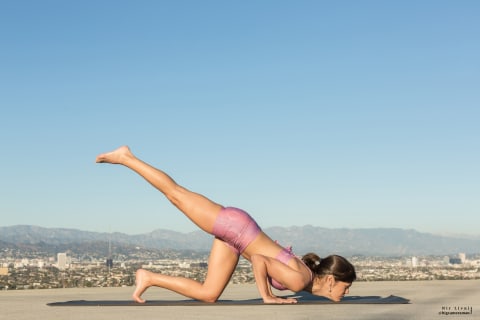
Lie on all fours. Place your chin on the floor but make sure you are pressing your hands into the floor to lift up your body slightly, in order to not crunch your neck. Keep one knee on the floor for stability. Then lift your other leg toward the sky. Hold here for 5 breaths. Then move onto the next step, or rest if this was enough for you today.
Full Locust Prep 2
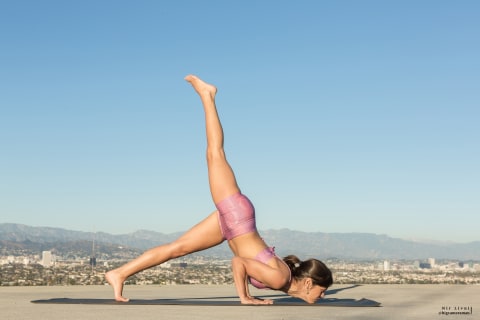
Tuck the toes under on the foot that is still on the floor, and lift up your knee. Your points of contact with the floor should be one foot, both hands, and your chin. Engage your legs and hands and hold for 5 breaths. Then move onto the next step, or rest if this was enough for you today.
Full Locust Prep 3
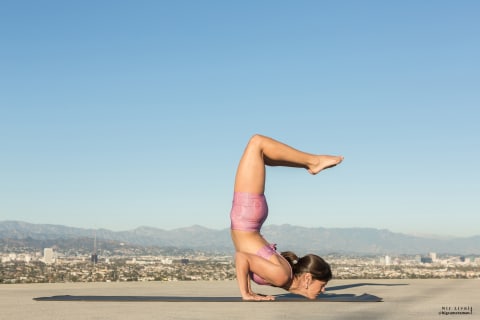
Kick up your legs and see if you can stay hovering in the air. Make sure that when you kick up you are pressing your hands firmly into the ground and not putting your weight on your neck. Engage your core and use your back muscles. Hold here for 5 breaths or attempt to kick up 5 times. Then, if you can hold this for a little bit with support in your arms, go on to the last move.
Full Locust
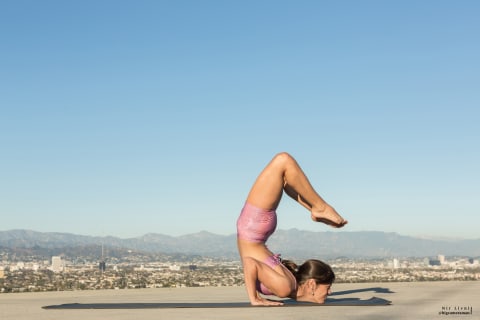
This last step is where you finalize the pose. Once you’re hovering in the previous pose, start to lift the chest a little to pull the sternum forward. At the same time, bend your knees bend and actively arch your back. Doing this simultaneously is what will create the balance and the back bend desired. Point the toes and keep looking up and lengthening your neck and spine while arching. This will create the support needed to not injure or strain the spine. Take 5 deep breaths. Then, slowly bring one leg at a time down and rest on your belly. Make a pillow with your hands under your cheek, and take 5 breaths.
Watch Next
Enjoy some of our favorite clips from classes
Enjoy some of our favorite clips from classes
What Is Meditation?
Mindfulness/Spirituality | Light Watkins
Box Breathing
Mindfulness/Spirituality | Gwen Dittmar
What Breathwork Can Address
Mindfulness/Spirituality | Gwen Dittmar
The 8 Limbs of Yoga - What is Asana?
Yoga | Caley Alyssa
Two Standing Postures to Open Up Tight Hips
Yoga | Caley Alyssa
How Plants Can Optimize Athletic Performance
Nutrition | Rich Roll
What to Eat Before a Workout
Nutrition | Rich Roll
How Ayurveda Helps Us Navigate Modern Life
Nutrition | Sahara Rose
Messages About Love & Relationships
Love & Relationships | Esther Perel
Love Languages
Love & Relationships | Esther Perel


